1)
Remove dashboard – This is done by –
a)
Removing 2 screws in the top of the black surround and the cover then
pulls out – It is clipped at the bottom so be easy pulling it out.
b)
4 screws now hold in the dashboard in each corner- remove these
c) 3 wiring plugs are plugged in the back of the dash –unplug these and remove the dash.
2)
Open up the Dashboard (backing and the transparent plastic cover)
a)
Transparent plastic cover – clips off with a few clips
b) Backing also clips off and you should now be at the gauges
3) Remove screws on the gauges (small screws next to needles- be careful not to scratch the gauges)
4) Slot the kit into place with care (be careful going over the needles)
5) Match the speed/Rev markings on the kit with original equipment
6) Put the screw that you removed on Step 3 back on
7) Where the cables pass through the covers you will need to file down the cover to stop the cable sgetting pinched.
8) Assemble the dashboard (backing and then transparent plastic cover)
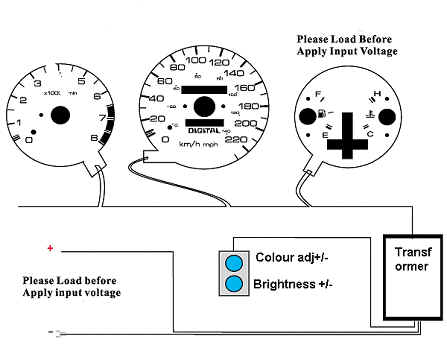
9) Connect plugs (on transformer) to the kit*
10)
Connect power wires (on transformer) to the car- check with multi-meter
a)
Connect positive to dashboard power supple wire ( red cable with black stripe)
b)
Connect earth wire (black beside the positive)
*Warning: Plugs on transformer must connect to the kits before power can feed into transformer!!!
Note:
(1) This fitting instruction is only for reference not provided for specific
model of car.